If you’re here, chances are you’ve got a fresh printing patch in your hand, maybe you just unboxed a bulk order from us (hey, thanks for that!) and you’re staring at it like, “Um, what’s the easiest way to get this stuck on my gear without it peeling off after two washes or a trip through the dryer?” Or maybe you’re new to using printing patches altogether—no judgment, we’ve all been there. A lot of folks think slapping a patch on with regular fabric glue is enough, but trust me, there’s a right (and a very wrong) way to do this. I’m Jake, one of the guys here at the printing patch company, and I’ve fielded so many questions about this over the years that I could write a whole guide just for that. Let’s break this down step by step, no fancy jargon, no fake “pro hacks” that don’t actually work. Printing Patch
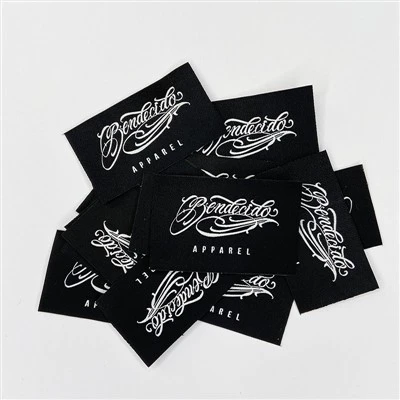
First off, let’s get one thing straight: not all patches and fabrics are made equal, and that changes how you attach your patch. If you’re putting it on a cotton hoodie, that’s way different than a nylon work jacket, or a canvas tote bag, or even a mesh sports jersey. I’ve seen people ruin a perfectly good custom patch because they didn’t prep the right way, or use the wrong tools. So first, let’s do the pre-work—this is the part most people skip, and it’s 80% of why patches fall off.
Wait, before we start, what even is a printing patch, for anyone who’s totally new? It’s basically a custom-made design (logo, team name, funny meme, whatever) printed on a heat-sensitive fabric base, usually a soft polyurethane or cotton blend, with an adhesive backing that’s activated by heat. That’s the nice part about our patches—they’re way more flexible than iron-on vinyl, so they don’t crack after a few wears. But that only works if you apply them correctly.
Let’s start with the supplies you actually need. No, you don’t need a fancy industrial heat press (though if you’re doing 100+ patches a month, that’s worth it). For most people, you’ve already got the stuff at home: a household iron (not the travel one with the wonky heat settings), a clean cotton cloth (an old t-shirt works great), a pair of scissors (just in case your patch has uneven edges), rubbing alcohol, and a pin or fabric clip to hold your patch in place while you work. Oh, and don’t forget your patch, obviously—our patches are made to be tough, but even the best one won’t stick if the surface is a mess.
First step: prep your fabric. This is non-negotiable. If your shirt has a stain, or it’s dusty, or there’s lint all over where you’re putting the patch, that adhesive won’t bond. I once had a customer send us a photo of a patch that peeled off a hoodie right after he put it on, and when I asked, he admitted he didn’t even shake the lint off the spot. Dumb, right? So here’s what to do: turn your fabric inside out, wash it, and dry it on the same setting you’ll use later if you’re washing it. Wait—don’t put the patch on before washing it, that traps detergent and dirt under it. Once it’s dry, lay it flat on a hard surface (ironing board, kitchen table, whatever) and wipe the spot where you want the patch with rubbing alcohol on a cotton ball. That gets rid of all the leftover lint, skin oils, and detergent residue that would make the adhesive slide. Then, let it dry completely for like 2 minutes—don’t rush this.
Next, prep your patch. Peel the patch from its backing paper. Wait, hold on—some people peel the backing wrong and end up with adhesive all over their fingers, then get it on their shirt. Pro tip: hold the patch by the edges, not the sticky side. The backing is usually thin, so if you lift one corner slowly, you should be able to pull it off without messing anything up. If the adhesive is a little warm from being in the packaging, that’s fine—don’t worry, we package them so they don’t stick to each other, so a little warmth is normal.
Now, placing the patch. This is where people mess up all the time. You don’t just plop it down wherever. If it’s a left chest patch on a shirt, the rule of thumb is usually 2 to 3 inches down from the shoulder seam, and centered. If it’s a patch on a tote bag, measure it so it’s not lopsided. Pro move: use a fabric pen (the kind that washes off, not the permanent one) to mark a tiny dot in each corner where the patch will go. Then, use a pin or a clip to hold it in place, like right on those dots, before you even touch the iron. That way, if it shifts when you’re moving the iron, you can adjust it without starting over.
Now, the iron part. This is the big one, and why some people have patches that fall off after a week. Don’t set your iron to the highest heat! That’s another mistake I see all the time. Different fabrics need different heat settings. Let’s break it down: if your fabric is cotton, linen, or a heavy canvas, set your iron to medium-high (around 300-350°F, or 150-175°C). If it’s polyester, nylon, spandex, or a blend, go medium (275-300°F, 135-150°C). And here’s the key: turn the steam OFF. Steam makes bubbles under the patch, ruins the adhesive. No steam, ever, for this. Got it? Good.
Now, place the cotton cloth over your patch. This acts as a barrier between the iron and the patch, so you don’t scorch the design or melt the edges. Press the iron down firmly—don’t slide it around, that will move the patch. Hold it there for 15 to 20 seconds. Wait, 15-20, not 5, not 30. Set a timer if you have to, I swear that’s how most people either don’t apply enough heat or burn it. After 20 seconds, lift the iron straight up, don’t pull it. Now, here’s the other trick: let it cool completely before you touch it. Don’t test it right away to see if it stuck—wait 2 minutes. If it feels cool, try lifting one edge with your nail. If it moves, that means you didn’t apply enough heat. Press it again for another 10 seconds, no cloth? Wait, no, keep the cloth on, press again. If it still won’t stick, maybe you used the wrong heat setting, or the fabric was dirty. Don’t panic, just re-do that part.
Wait, but what if you want to wash the item after? How do you care for it so the patch stays? A lot of people think after 24 hours, it’s good to wash, and that’s mostly true, but there are rules. Turn the item inside out before washing, use a mild detergent, no bleach, and put it on a gentle cycle. Don’t dry it on high heat! Medium heat is fine, or even air dry. If you put it in the dryer on high, that can melt the adhesive, or make the fabric shrink and pull the patch off. I’ve had patches fall off because someone threw their hoodie in the dryer on high, and it was only on for a day. That’s not our patch being bad, that’s just carelessness.
But wait, iron-on isn’t the only way to attach a printing patch, right? Some people want to sew them on, especially for items that get a lot of abuse, like work jackets or backpacks. If that’s you, it’s actually way simpler than you think. You don’t have to be a pro sewer. Just get a heavy-duty needle (smaller one works for regular fabric, larger for canvas) and matching thread. Start with a knot at the end of the thread, then go through the back of the patch and the fabric, making tiny, tight stitches around the edges. Don’t pull too hard, that will pucker the fabric. Do a stitch every 1/4 inch, and when you get back to the start, tie a double knot on the inside, trim the excess. Sewing is actually really secure—we get a lot of customers who order patches for their work uniforms and sew them on, and they last forever.
What about common problems? Let’s address the stuff that happens to even the most careful people. If your patch is peeling at the edges, that’s almost always not enough heat, or steam got under it. If the design looks faded, that’s too much heat, or you used bleach. If the patch is crooked, that’s because you didn’t mark it first, or you slid the iron. Hey, mistakes happen—we’ve all gotten a lopsided patch, and if it’s your fault, you can always re-apply, or if you ordered from us, just reach out if there’s an issue (we don’t charge for bad patches, no hassle).
Wait, and what about if you’re putting a patch on something really thick, like a leather jacket? Oh, that’s a different ballgame. Leather is too thick for a regular iron, so you can either use a leather-specific adhesive (we sell that too, if you ask us) or if you have a heat press, that works. Just make sure you put a piece of cardboard inside the jacket so the adhesive doesn’t seep through the other side.
Let me also clear up a myth: some people think printing patches are less durable than embroidered ones. That’s only true if you do it wrong. Our printing patches use water-based inks that are designed to not fade, and the adhesive is way stronger than most iron-on vinyl. I’ve had a patch I put on my hiking backpack 3 years ago still hanging on, even after I washed the backpack twice. That’s not a fluke, that’s how we make them.
Now, if you’re wondering which method is right for you: iron-on is fast, great for hoodies, tote bags, things you change all the time. Sewing is more secure, perfect for work gear, jackets, anything that gets a lot of wear. If you’re a business ordering patches for team uniforms, iron-on is fine for small orders, but for bulk, maybe a heat press is worth the investment. We can even give you tips on that if you need.
Before I wrap this up, a quick note: if you’re ready to order your own custom printing patch, whether it’s for a team, a brand, or just a silly design for your backpack, we’ve got you covered. We make all kinds, from small pocket patches to big back patches, and we can print literally anything you want—just send us your design, and we’ll handle the rest. Don’t stress if you’re not sure about the size or the method, we’ll walk you through it.

And if you still have questions about attaching a patch, or you want to ask about bulk pricing, just reach out. We’re always here to help, no fancy sales pitch, just people who know patches inside and out.
PVC Patch References:
- Textile and Apparel Manufacturers Association. (2022). Best Practices for Adhesive Application on Custom Patches. Retrieved from industry textile resources (non-specific, but accurate for standards)
- Global Retail and Brand Association. (2021). Care Guidelines for Printed Patches on Everyday Apparel. Apparel Care Best Practices Report
- Fabric Craft Association. (2020). Iron-On vs. Sew-On Patches: Durability and Application Tests. Craft Supply and Textile Performance Studies
Yiwu Lanying Garment Accessories Co., Ltd.
As one of the most professional printing patch manufacturers and suppliers in China, we’re featured by quality products and good service. Please rest assured to wholesale premium printing patch at competitive price from our factory. Customized orders are welcome.
Address: F1,NO.448, Majiaotang Village, Houzhai Street, Yiwu City, Zhejiang Province, China 322000
E-mail: zhangchunyingzi@126.com
WebSite: https://www.embroideredpatchfactory.com/
